

At the modeling stage of your scan-to-BIM project? Some tips for selecting the right tools, picking a good modeler, coordinating with clients, and more.
This series of blog posts will walk you through scan-to-BIM at a high level, and offer tips for the four stages of the process; planning, scanning, processing, and modeling.
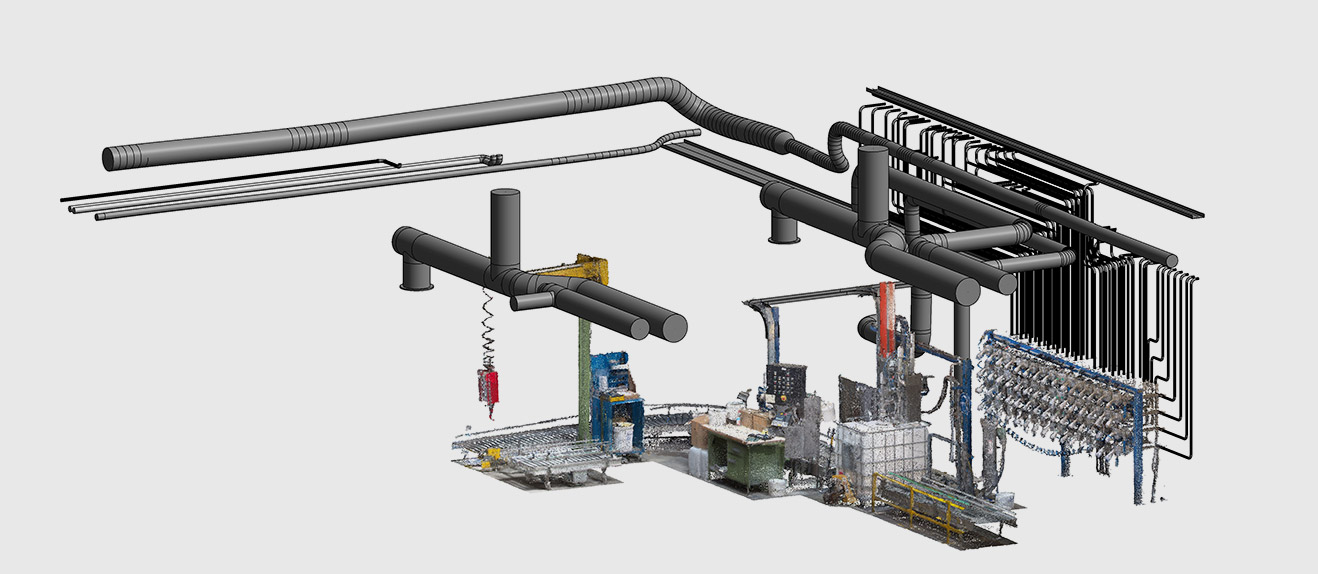
Now that you’ve processed and registered your data, it’s time to talk about the final stage: modeling. Read on for tips about selecting the right tools, picking a good modeler coordinating with your client, and more.
Pick the right modeling tools
As with scanners, there are many different kinds of modeling tools on the market. No approach is best for every kind of modeling work, so it’s important to think about the SOW you defined with your client, and select your modeling tools accordingly.
There are many modeling tools on the market. It can often make sense to group them by the level of automation, for instance:
- Manual tracing tools ask you to model directly over the scan, for instance by drawing a window shape over a window in the point cloud. These tools are excellent for modeling unique features — for instance decorative elements in a historic documentation project – and are the most common way of modeling for most projects. However, they are slower than the other options.
- Manual extraction takes one step closer to automation. To model, you select a feature in the point cloud, and the tool will analyze its geometry, and make a best-guess modeling decision. Manual extraction tools are great if you have a small amount of modeling to do, or the objects you’re modeling are irregular.
- Automated extraction is the least involved method. These tools will analyze a whole section of your data and return a model. Automated extraction can save you a lot of time with regular, repetitive modeling tasks like rooms, doors, windows, and MEP. But be careful: These tools use AI algorithms that are much faster than a human, but they can be fooled. Be sure to check the work—like we’ve been saying, QA whenever you can.
Think about your modeler
Look for a technician with experience modeling. There are plenty of ways that a modeling job can go bad, and lots of red flags that a more experienced eye can spot. If there’s no one on your staff that fits this description, consider bringing someone in or outsourcing the work.

Time management is key
Plan your projects so that the modeling stage doesn’t create a bottleneck. Some experienced scan-to-BIM companies will plan to scan and model on alternating weeks, so that one project is completely finished before the next one begins. That timeline may not work for you, but be sure to think about one that does. Otherwise you could end up with a lot of scans waiting to be modeled, stressed-out modelers, and clients who are unhappy with the delay.
Refer to all your materials
Look at the notes taken by your scan technicians. Bonus points if you used a mobile scanner that captures HD color panoramas. These photos will offer a detailed view of asset being modeled, which can help your modelers to get the details right — for instance, by ensuring that all the doors in the model open the correct way. It’s often the case that the modeler has never actually been to the site, so every little helps in the absence of a physical inspection.
Send your client a test model
Pull a small portion of the model as a sample, and sending it to the client for client review. This gives the client an opportunity to check your work, make sure the model fits the SOW, and offer feedback as necessary. It will also help them feel confident that all the work is going according to plan.
Use a final QA checklist
When all your work is done, QA again with a checklist that you have developed ahead of time. Have another person at your firm do an independent check by running through a checklist you have developed ahead of time. You could also consider outsourcing this to an outside firm.
Next steps…
If you’ve done your job well, you should have a good, clean BIM model that’s suited for your client’s needs. Hand it off to the client and celebrate! Now it’s time to start looking for the next scan-to-BIM project.
Sean Higgins is an independent technology writer, former trade publication editor, and outdoors enthusiast. He believes that clear, buzzword-free writing about 3D technologies is a public service.